
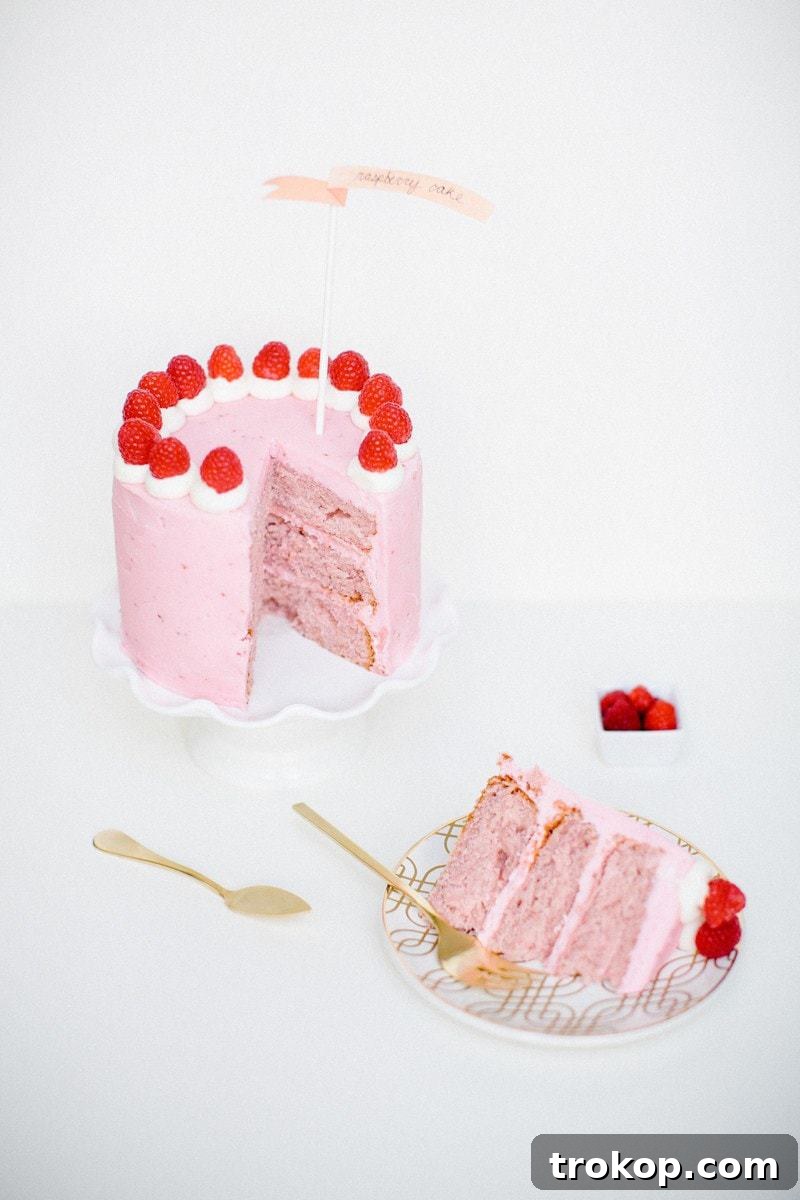
Indulge in Pure Delight: The Ultimate Raspberry Layer Cake Recipe
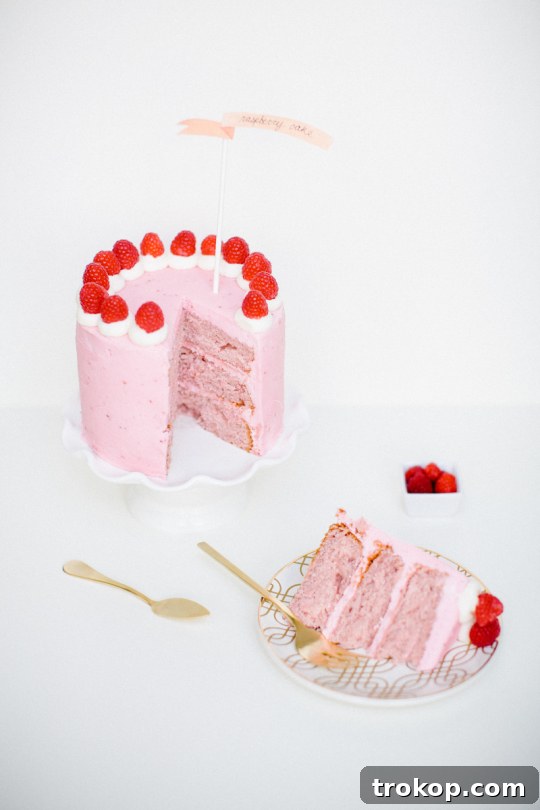
Sweet, tart, and undeniably beautiful, this Raspberry Layer Cake stands as a testament to classic baking, perfect for elevating any celebration or simply creating a memorable moment for your loved ones. Imagine soft, incredibly moist cake layers infused with the bright, vibrant essence of fresh raspberries, enveloped in a rich, velvety raspberry buttercream frosting. This isn’t just a dessert; it’s an experience, a masterpiece that promises to captivate both the eyes and the palate.
Few desserts possess the immediate charm and universal appeal of a well-crafted Raspberry Layer Cake. Its striking visual appeal, with those distinct ruby-red layers peeking through a perfectly smooth frosting, makes it an instant showstopper. Beyond its beauty, the flavor profile is a harmonious blend of sweet and tangy, a refreshing change from heavier desserts. Whether you’re planning a lively birthday party, an elegant bridal shower, or a romantic Valentine’s Day gathering, this recipe is guaranteed to impress, leaving every guest swooning over its exquisite taste and stunning presentation.
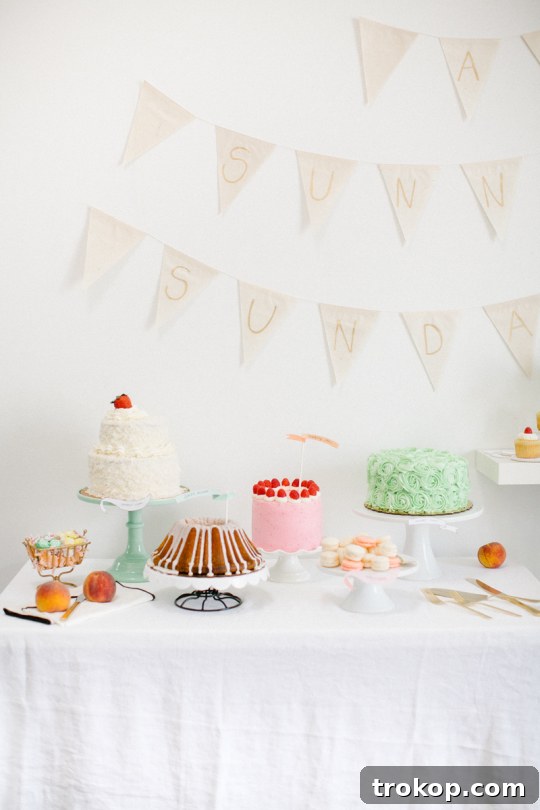
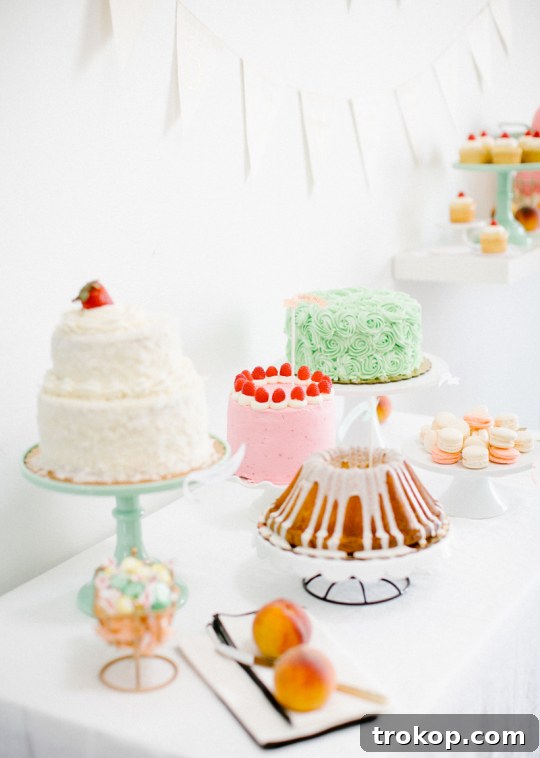
This particular recipe comes with a delightful backstory! It was a star attraction at our Easter Sunday dessert table, lovingly baked by the talented Kristina of Buttercup Bakery. We were incredibly fortunate that she was willing to share her coveted, yet surprisingly easy, raspberry cake recipe. Don’t let the professional appearance of this cake intimidate you; crafting it is much simpler than it looks. Our comprehensive, step-by-step guide is designed to empower both seasoned bakers and complete novices, ensuring you can achieve a bakery-quality cake brimming with irresistible homemade charm. Get ready to embark on a delightful baking journey that culminates in a truly unforgettable dessert.
Are you prepared to impress your guests and savor the sweet rewards of your baking efforts? Gather your essential ingredients, preheat your oven to the perfect temperature, and let’s dive into the delightful world of baking! This Raspberry Layer Cake promises to be your new go-to dessert, a dependable recipe that delivers exceptional results every single time.
Ingredients Needed for Your Perfect Raspberry Layer Cake
Crafting this luscious Raspberry Layer Cake begins with selecting the finest ingredients. Each component plays a crucial role in achieving the desired texture, flavor, and vibrant appeal. Here’s what you’ll need to create both the tender cake layers and the silky-smooth buttercream frosting:
For the Raspberry Cake:
- Sifted Cake Flour: This is the secret to a supremely light and airy cake. Sifting the cake flour not only removes any lumps but also aerates it, leading to a finer, more tender crumb. Unlike all-purpose flour, cake flour has a lower protein content, which minimizes gluten development and ensures a delicate texture.
- White Granulated Sugar: Beyond its role in sweetness, sugar contributes to the cake’s moisture content and helps with browning for those beautifully golden layers.
- Whole Milk: The richness of whole milk adds moisture and tenderness to the cake batter, ensuring a luxurious, soft crumb that truly melts in your mouth.
- Raspberry Jam or Raspberry Puree: This is where the star flavor comes from! Raspberry jam provides concentrated sweetness and a deeper, cooked berry note, while fresh raspberry puree offers a brighter, tangier, and more vibrant fruit flavor. Feel free to choose based on your preference or combine both for a complex profile.
- Eggs: Essential for structure, emulsification, and richness, eggs bind the ingredients together, creating a stable yet tender cake. Ensure they are at room temperature for better incorporation into the batter.
- Egg Yolks: Adding extra egg yolks boosts the cake’s richness, moisture, and tenderness, contributing to a truly decadent texture and a beautiful golden hue.
- Unsalted Butter: The foundation of flavor and richness. Using unsalted butter allows you to control the overall salt content of the recipe. Ensure it’s softened to room temperature for proper creaming with the sugar.
- Baking Powder: A key leavening agent that helps the cake rise, creating those delightful fluffy layers.
- Vanilla Extract: A classic flavor enhancer that complements the raspberry beautifully, adding a warm, aromatic depth to the cake.
- Salt: A pinch of salt is vital for balancing the sweetness and intensifying all the other flavors in the cake, making them truly pop.
- Optional: Red Food Coloring: While the raspberry jam/puree provides some natural color, a few drops of red food coloring can enhance the cake’s presentation, giving it a more vivid and appealing raspberry hue. Use sparingly to achieve your desired shade.
For the Raspberry Buttercream Frosting:
- Powdered Sugar: The base for any smooth buttercream. Sifting it is crucial to prevent lumps and achieve that silky texture.
- Butter: The main component of the buttercream, providing its creamy texture and rich flavor. Like the cake butter, ensure it’s at room temperature for optimal whipping.
- Raspberry Jam: Infuses the frosting with that irresistible raspberry flavor and a beautiful pink tint.
- Vanilla Extract: Adds a layer of aromatic sweetness that perfectly complements the fruit.
- Optional: Red Food Coloring: For an even more intense and eye-catching pink or red frosting.
- Optional: Fresh Raspberries: Perfect for an elegant garnish, adding a burst of fresh flavor and visual appeal to the finished cake.
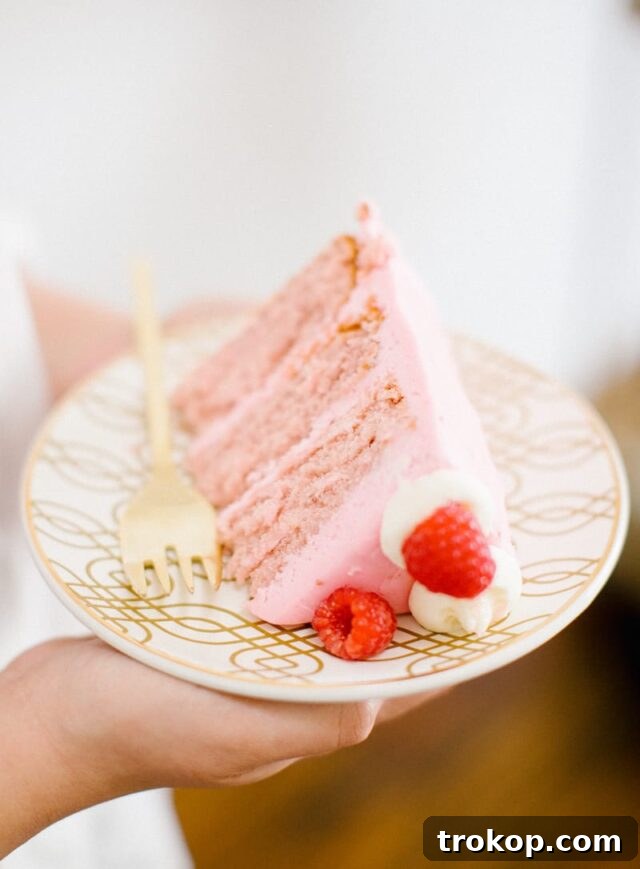
How to Make an Easy Raspberry Layer Cake: Your Step-by-Step Guide
Baking this stunning Raspberry Layer Cake is a rewarding experience, and with our detailed instructions, it’s simpler than you might imagine. Follow these steps to create a show-stopping dessert from scratch.
Prepare the Raspberry Cake Batter:
1 — Get Ready for Baking: Begin by preheating your oven to 350°F (175°C). This ensures the oven is at the correct temperature for even baking from the start. Next, prepare three 8-inch round cake pans. This crucial step prevents sticking and ensures easy release: butter each pan generously, dust with flour (tapping out any excess), and then line the bottoms with parchment paper circles. This triple-action prep is your safeguard against a stuck cake. Set your prepared pans aside.
2 — Combine Dry and Wet Separately: In a medium mixing bowl, sift together the cake flour, baking powder, and salt. Sifting again here helps ensure these dry ingredients are thoroughly combined and free of lumps, which contributes to a smoother batter and a lighter cake. In a separate, smaller container, whisk together the vanilla extract and whole milk. Set both the dry and wet mixtures aside for later integration.
3 — Creaming Butter and Sugar: In the bowl of a stand mixer fitted with the paddle attachment (or using a hand mixer), cream together the softened unsalted butter and white granulated sugar. Beat them on medium speed for approximately 5 minutes. This extended creaming process is vital; it incorporates air into the mixture, creating a light, fluffy, and pale yellow base for your cake, which will contribute significantly to its tender texture.
4 — Adding Eggs for Structure and Richness: Stop the mixer and scrape down the sides of the bowl to ensure all the butter and sugar are incorporated. Then, add the eggs one at a time, beating well after each addition. Allow each egg to fully incorporate into the mixture, which usually takes about 15 seconds, before adding the next. This gradual addition helps emulsify the mixture, preventing it from curdling. Scrape down the bowl once more after adding all eggs to guarantee everything is evenly mixed.
5 — Infuse with Raspberry Flavor: Mix in the raspberry puree or jam until it is completely combined with the batter. You’ll notice the batter taking on a beautiful fruity aroma and a subtle pinkish tint. Ensure there are no streaks of unmixed jam or puree.
6 — Alternating Dry and Wet Ingredients: Reduce the mixer speed to its lowest setting. Begin adding the sifted dry ingredients to the butter mixture in three alternating additions with the wet milk mixture. Always start and end with the dry ingredients. Mix just until combined after each addition, being careful not to overmix, as this can develop too much gluten and result in a tough cake.
7 — Achieve a Vibrant Hue (Optional): If you desire a deeper, richer raspberry color for your cake, now is the time to add a few drops of red food coloring. Mix gently until the desired shade is achieved. Remember, this step is purely for aesthetic appeal.
8 — Even Distribution is Key: Remove the bowl from the mixer and use a rubber spatula to gently fold the batter a few times. This ensures that any ingredients clinging to the bottom or sides of the bowl are fully incorporated and prevents streaks of flour. Divide the batter evenly among the three prepared 8-inch cake pans. Use the back of a spatula to gently smooth the tops of the batter in each pan, ensuring even layers.
9 — Bake to Perfection: Transfer the cake pans to your preheated oven. Bake for 17–22 minutes. Baking times can vary depending on your oven, so start checking after 17 minutes. The cakes are done when a toothpick inserted into the center of a cake layer comes out with only a few moist crumbs attached, or clean. A delightful aroma filling your kitchen is also a good indicator that they’re nearly ready. Once baked, remove the cakes from the oven and let them cool in their pans on a wire rack for about 10-15 minutes before inverting them onto the rack to cool completely. It is absolutely crucial that the cake layers are entirely cool before you even think about frosting them; any residual warmth will melt your beautiful buttercream.
Make the Raspberry Buttercream Frosting:
1 — Whip the Butter: In the bowl of a stand mixer fitted with the paddle attachment, beat the softened butter on medium speed for a full 5 minutes. This vigorous beating incorporates air, making the butter light, pale, and incredibly creamy—the ideal base for a fluffy buttercream. Once sufficiently whipped, reduce the mixer speed to the lowest setting.
2 — Gradually Add Powdered Sugar: With the mixer on low, gradually add the sifted powdered sugar, about 2 cups at a time. Mix slowly until each addition is fully incorporated into the butter before adding more. This prevents a cloud of sugar from engulfing your kitchen! Continue this process until all the powdered sugar has been blended into the butter, creating a thick, sweet mixture.
3 — Flavor and Fluffiness: Add the vanilla extract and your desired amount of red food coloring (if using) to achieve a vibrant pink. Increase the mixer speed to medium-high and beat the frosting for another 2 minutes. This final whipping step lightens the texture significantly, making the buttercream wonderfully fluffy and smooth. Finally, reduce the mixer speed to the lowest setting again and beat for an additional 2 minutes; this crucial step helps to eliminate any lingering air bubbles, resulting in a professional-looking, ultra-smooth frosting texture that’s a dream to work with.
Assembling the Cake:
1 — Layering with Care: Once your cake layers are completely cool and your buttercream is ready, it’s time to assemble. Place your first cake layer on your chosen serving plate or cake stand. Using an offset spatula or knife, spread a generous, even layer of the raspberry buttercream over the top. Gently place the second cake layer directly on top, aligning it carefully. Repeat this process with the remaining cake layers and frosting, creating your desired stack.
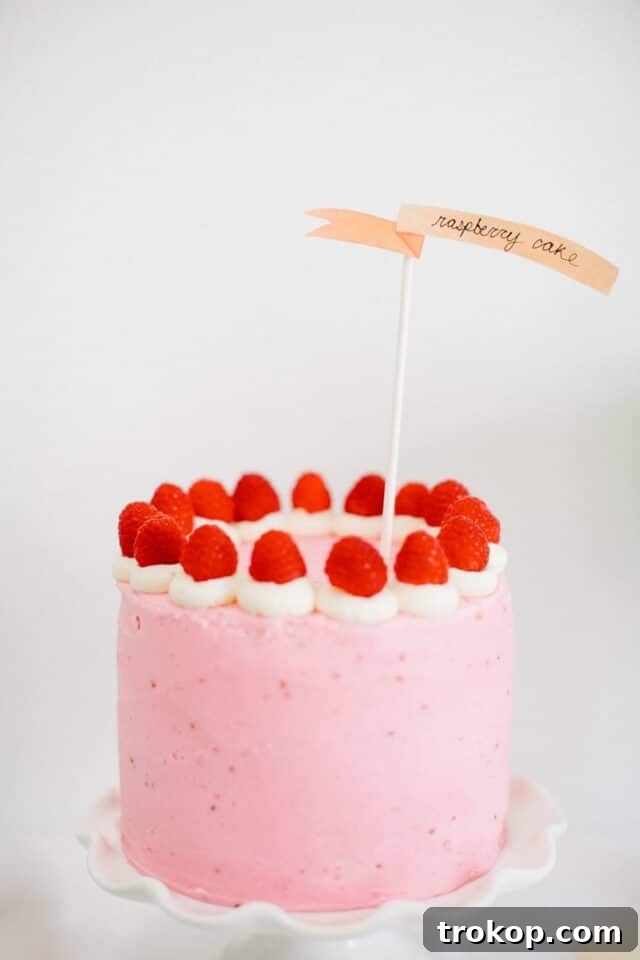
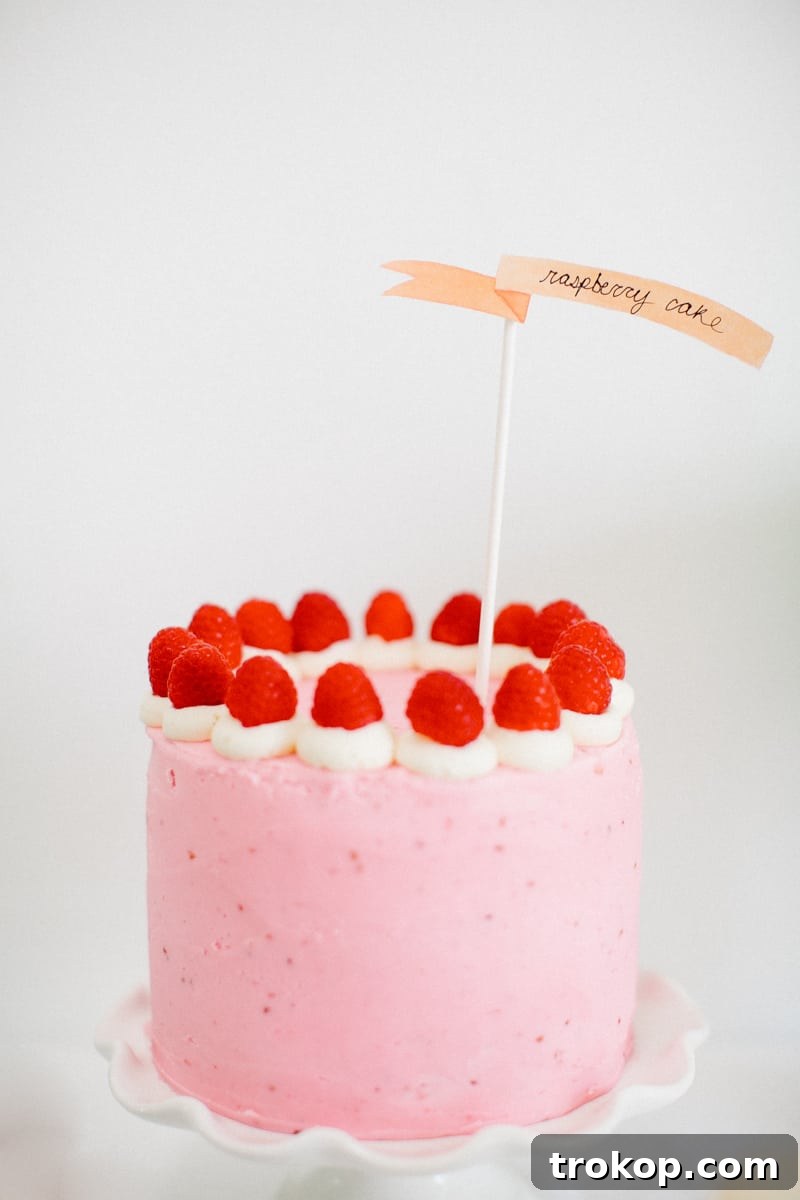
2 — Achieve a Polished Finish: After stacking the layers, use your offset spatula to apply a thin “crumb coat” of buttercream all over the entire cake – sides and top. This thin layer traps any loose crumbs, ensuring they don’t appear in your final decorative coat. Refrigerate the cake for 15-20 minutes to set the crumb coat. Once firm, apply the remaining raspberry buttercream, smoothing it out for a perfectly polished, professional look. You can create swoops, swirls, or a perfectly smooth finish – whatever your heart desires! Garnish with fresh raspberries for an extra touch of elegance.
Recipe Notes and Tips for Raspberry Layer Cake Success
Achieving a perfect Raspberry Layer Cake is all about paying attention to a few key details. Here are some expert tips and tricks to ensure your cake turns out flawlessly every time:
- Room Temperature Ingredients are Non-Negotiable: For the absolute best results, it is critical that your butter, eggs, and milk are all at true room temperature. This isn’t just a suggestion; it’s a foundational step. Room temperature ingredients emulsify much more easily, meaning they blend smoothly and evenly, creating a uniform batter. Cold ingredients will cause the batter to curdle or become lumpy, leading to an inconsistent texture in your final cake.
- Cooling is Absolutely Key: Patience is a virtue, especially when it comes to cooling cake layers. Ensure your cakes are completely, unequivocally cooled before you even consider applying frosting. Even the slightest residual warmth in the cake layers can cause your meticulously made buttercream to melt, slide off, and create a messy, frustrating situation. Plan ahead and allow ample cooling time.
- Chill the Frosting if Needed: If you find your raspberry buttercream becoming too soft or runny while you’re working with it (especially in a warm kitchen), don’t panic! Simply pop the bowl of frosting into the refrigerator for 10-15 minutes. This will help it firm up. After chilling, give it a quick whip with your mixer on low speed to restore its smooth, spreadable consistency.
- Level the Cake Layers for Stability: For a truly professional-looking and stable layer cake, it’s often necessary to level the cake layers. After they have cooled, if any layers have domed tops, use a serrated knife or a cake leveling tool to trim off the domed portion, creating a flat, even surface. This ensures your cake layers stack neatly without leaning and helps prevent gaps.
- Make Ahead for Convenience: This recipe is wonderfully accommodating for busy schedules. You can prepare the cake layers a day or even two days in advance. Once fully cooled, wrap each layer tightly in plastic wrap to prevent them from drying out, and store them at room temperature. The buttercream can also be made ahead; store it in an airtight container in the refrigerator for up to 3-4 days. Before using, bring it back to room temperature and re-whip it with your mixer until light and fluffy again.
- Garnishing Tips for a Professional Touch: Elevate your cake’s presentation with thoughtful garnishes. Fresh, vibrant raspberries placed artfully on top or around the base add a pop of color and a burst of fresh flavor. A light dusting of powdered sugar over the finished cake can add a delicate, elegant touch. For a more elaborate finish, use a piping bag fitted with a star tip to pipe decorative swirls or borders of buttercream around the edges of each layer or the top of the cake.
- Storage Best Practices: To maintain its freshness, store any leftover Raspberry Layer Cake in an airtight container in the refrigerator for up to 3 days. This prevents the cake from drying out and the frosting from spoiling. For the best flavor and texture, allow slices to come to room temperature for about 15-20 minutes before serving.
- Exciting Variation Ideas: Don’t be afraid to experiment with flavors! For a bright, citrusy twist that perfectly complements raspberries, try layering the cake with a thin spread of tangy lemon curd between the cake and buttercream layers. If you’re a chocolate lover, a drizzle of rich chocolate ganache can be added between the layers for a truly decadent combination. Alternatively, if you prefer a different frosting, consider a classic Italian meringue buttercream frosting for a less sweet, incredibly smooth option.
More Delicious Dessert Recipes to Explore
If you loved creating and tasting this Raspberry Layer Cake, you’re in for a treat! Our kitchen is always buzzing with new and exciting dessert ideas. Here are a few more recipes that promise to bring joy to your taste buds and impress your guests:
- Funfetti Birthday Cheesecake: A festive and creamy cheesecake bursting with colorful sprinkles, perfect for any birthday celebration.
- Funfetti Cookie Cake: The ultimate giant cookie, soft and chewy, loaded with sprinkles and ready to be decorated for any occasion.
- Mini Mochi Cakes: Delightful and chewy individual cakes with a unique texture, a modern twist on a traditional favorite.
- No Bake Mini Rainbow Cakes: Vibrant, colorful, and incredibly easy to make, these mini cakes require no oven and are perfect for a quick, cheerful treat.
Raspberry Layer Cake Recipe
A super moist easy raspberry layer cake recipe featuring fresh fruit and a delicious raspberry buttercream frosting.
Equipment
- 3 8-inch round cake pans
- Mixer (stand mixer or hand mixer)
- Large mixing bowl
- Medium mixing bowl
- Spatula (rubber and offset)
- Parchment paper
Ingredients
For the cake:
- 3 cup cake flour, sifted
- 2 cup white granulated sugar
- ½ cup raspberry jam or raspberry puree
- 3 eggs, room temperature
- 3 egg yolks, room temperature
- 2 sticks (1 cup) unsalted butter, softened
- 2 ½ tsp baking powder
- 2 tsp vanilla extract
- 1 ½ cup whole milk, room temperature
- 1 tsp salt
- Optional: Red food coloring
For the buttercream frosting:
- 2 lb (approximately 8 cups) sifted powdered sugar
- 1 lb (4 sticks) unsalted butter, softened
- ½ cup raspberry jam
- 1 tsp vanilla extract
- Optional: Red food coloring
- Optional: Fresh raspberries for garnish
Instructions
To make the cake:
- Preheat your oven to 350°F (175°C). Prepare three 8-inch cake pans by buttering, flouring, and lining them with parchment paper. Set them aside.
- Sift the cake flour, baking powder, and salt into a bowl. In a separate container, combine the vanilla extract with the milk and set both aside.
- In a stand mixer or using a hand mixer set to medium speed, cream the softened butter and sugar together for about 5 minutes until light and fluffy.
- Scrape down the sides of the bowl, then add the eggs one at a time. Allow each egg to fully incorporate, about 15 seconds, before adding the next. Scrape down the bowl again to ensure everything is evenly mixed.
- Mix in the raspberry puree or jam until it is fully combined and the batter takes on a fruity aroma and slight color.
- Reduce the mixer speed to low. Gradually add the dry ingredients in three parts, alternating with the wet milk mixture. Begin and end with the dry ingredients, mixing just until combined after each addition. Be careful not to overmix.
- If desired, add a few drops of red food coloring for a richer raspberry hue.
- Gently fold the batter with a spatula to ensure everything is evenly incorporated. Divide the batter evenly between the 3 prepared pans. Smooth the tops with a spatula.
- Bake the cakes for 17–22 minutes, or until a toothpick inserted in the center comes out with a few crumbs. Keep a close eye on them after 17 minutes. Cool the cakes completely on a wire rack before frosting.
To make the raspberry buttercream frosting:
- Beat the softened butter on medium speed for 5 minutes until it becomes light and creamy. Then, reduce the speed to the lowest setting.
- Gradually add the sifted powdered sugar, about 2 cups at a time, mixing on low until each addition is fully incorporated. Continue adding sugar until all is blended into the butter.
- Add the vanilla extract and any desired red food coloring. Increase the speed to medium and beat for another 2 minutes, or until the frosting lightens in texture and becomes fluffy. Reduce the mixer speed to the lowest setting again and beat for 2 minutes to eliminate air bubbles and achieve a smooth frosting texture.
Assembling the cake:
- Place one cooled cake layer on a serving plate or cake stand. Spread an even layer of raspberry buttercream over the top. Top with the second cake layer. Repeat with the desired stacks.
- Apply a thin crumb coat of buttercream to the entire cake (sides and top) to trap loose crumbs. Chill for 15-20 minutes. Then, use an offset spatula to apply the remaining buttercream, smoothing it out for a polished finish. Garnish with fresh raspberries if desired.
Nutrition
Calories: 537kcal | Carbohydrates: 77g | Protein: 4g | Fat: 25g | Saturated Fat: 15g | Polyunsaturated Fat: 1g | Monounsaturated Fat: 7g | Trans Fat: 1g | Cholesterol: 107mg | Sodium: 255mg | Potassium: 107mg | Fiber: 1g | Sugar: 61g | Vitamin A: 795IU | Vitamin C: 1mg | Calcium: 54mg | Iron: 1mg
This delightful recipe was shared by Kristina of Buttercup Bakery. Styling and DIY’s by Sugar & Cloth. Photography by Kimberly Chau. Illustrations by Lisa Chow. Mint green and white cake stands and bunting c/o Minted. Gold flatware and serving utensils from West Elm.
We absolutely adore seeing your culinary creations! Don’t forget to share your beautifully crafted raspberry layer cake with us on Instagram using the hashtag #sugarandclothloves. Your photos inspire us daily! Craving more quick, easy, and undeniably delicious recipes? You can find an extensive collection of our favorites right here, ready to inspire your next baking adventure.
Baileys Tiramisu Crepe Cake Recipe
Infused with Baileys and using delicate crepes as a delicious twist on a classic tiramisu.
Continue ReadingBaileys Tiramisu Crepe Cake Recipe
40 Delicious Easter Desserts to Sweeten Your Celebration
Get inspired by these festive and easy-to-make Easter desserts that will sweeten your holiday table.
Continue Reading40 Delicious Easter Desserts to Sweeten Your Celebration
34 Decadent Desserts for Valentine’s Day
Sweeten up your celebration with these irresistible desserts, perfect for a romantic Valentine’s Day treat.
Continue Reading34 Decadent Desserts for Valentine’s Day
Gingerbread Muffin Recipe with Lemon Glaze
Add a touch of warm spice to your breakfast or snack with these delightful gingerbread muffins, crowned with a zesty lemon glaze.
Continue ReadingGingerbread Muffin Recipe with Lemon Glaze