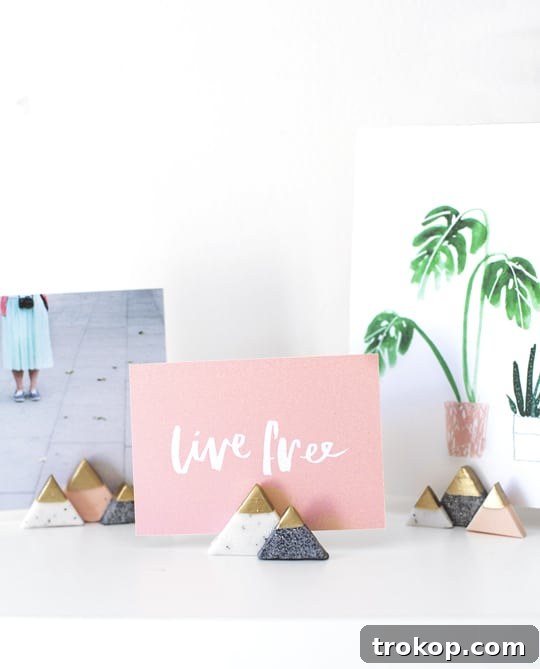
DIY Photo Holder: A Stylish and Functional Decor Project
Transform your cherished photos into a stylish and functional decor piece with this easy-to-follow DIY photo holder tutorial. Forget generic frames and embrace a unique way to display your memories! This project is not only simple but also adds a personal touch to any space.
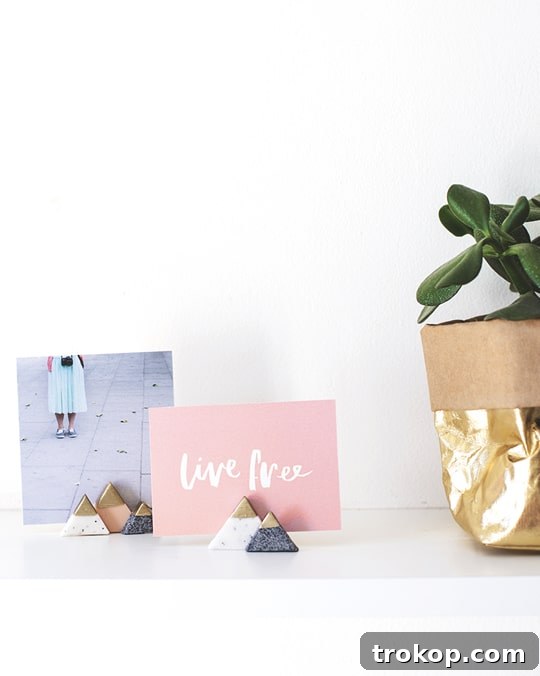
This polymer clay project results in the perfect DIY photo holder, a charming card display, or a delightful addition to your desktop decor. It’s incredibly easy to recreate, making it a fun and rewarding craft for all skill levels. Polymer clay is fantastic to work with and incredibly versatile! The best part is that this tutorial requires no intricate rolling or molding skills.
It honestly couldn’t be simpler! These DIY Photo Holders are an adorable way to display your favorite snapshots, artistic creations, or sweet mementos you gather along the way. They also make thoughtful and personalized gifts for friends and family.
Not to mention, these are perfect for the upcoming holidays! Imagine using them to showcase festive cards or small decorations. The possibilities are endless!
Scatter a few along a shelf or place one by your bedside to create an intriguing way of showing off your paper goods, particularly those pieces that are too precious for storage, but not quite large enough to adorn your walls.
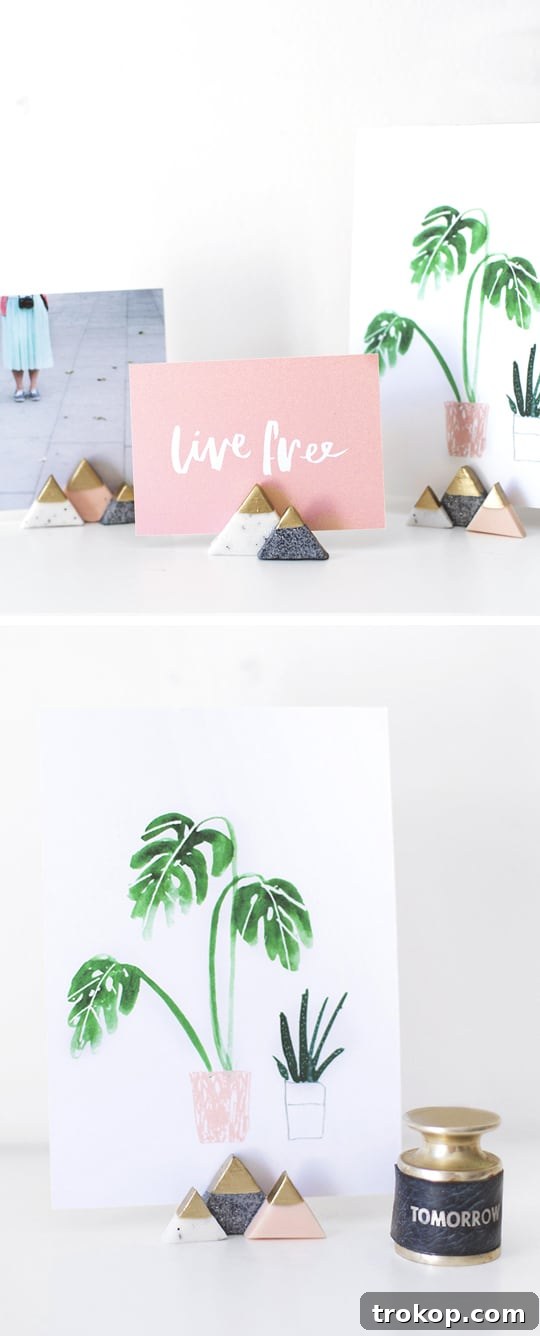
Materials Needed for Your DIY Polymer Clay Photo Holders
You only need a few simple materials to recreate these charming picture holders. This project is perfect for the upcoming holiday season or a relaxing long weekend crafting session. Here’s what you’ll need:
- Polymer Clay (3 blocks): Choose your favorite colors to match your decor. Different shades of grey and white can give a beautiful mountain effect.
- Cutting Knife: A craft knife or even a butter knife will work.
- Cutting Mat or Board: To protect your work surface.
- Metallic Gold Nail Polish: Adds a touch of elegance to the mountain tips.
- Strong All-Purpose Glue: To assemble the mountain range.
You can easily find polymer clay and other craft supplies at your local craft store or online. Experiment with different colors and finishes to customize your photo holders.
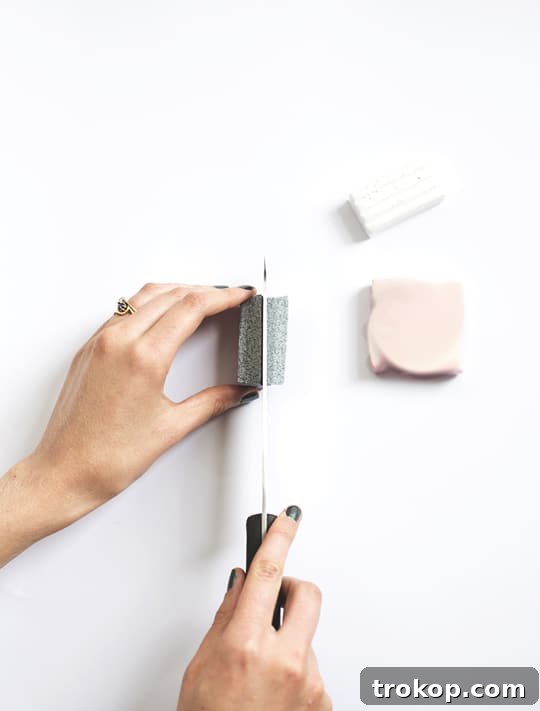
Step-by-Step Guide: How to Make DIY Photo Holders
Follow these simple steps to create your own mini mountain photo holders. This project is fun, easy, and yields beautiful results!
-
Preheat Your Oven: Start by preheating your oven to the temperature suggested on the clay packet. Different polymer clay brands may require slightly different temperatures, so be sure to check the instructions.
-
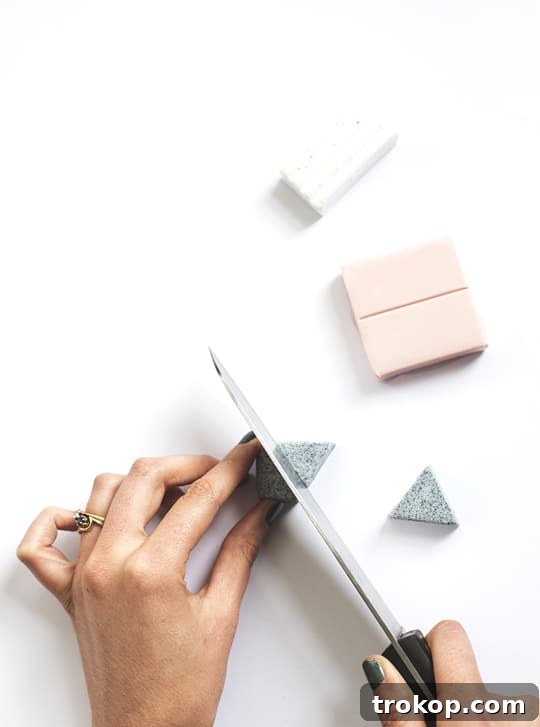
Slice the Clay: Begin by cutting your clay block in half with your knife to make the whole thing thinner. This makes the clay easier to work with and gives you more shapes.
-
Create Triangles: Cut triangles from this thickness, about an inch tall. These will be your actual photo holders.
-
Make a Slit: Use your knife to cut down the middle from the top of each triangle, stopping just short of the bottom. This will create the slit where you’ll place your photos or postcards.
-
Thin the Clay Further: Cut the remaining clay in half again, so it’s even thinner than before, but not so thin that it becomes flimsy. You want the pieces to be sturdy enough to stand up.
-
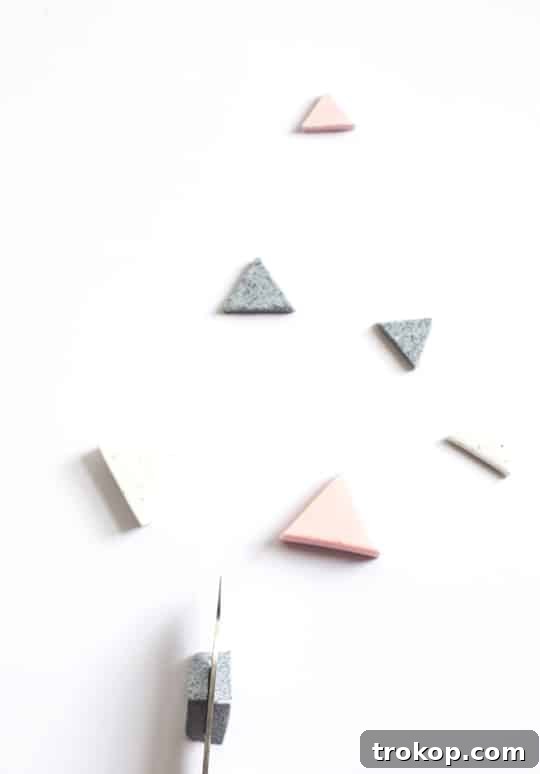
Cut Smaller Triangles: Cut out medium and small triangles from this new thickness to be used along with the larger ones later.
-
Bake the Clay: Place all of these on a tray lined with foil or baking paper and oven bake for the length of time suggested on the clay packet. This step hardens the clay and makes it durable.
-
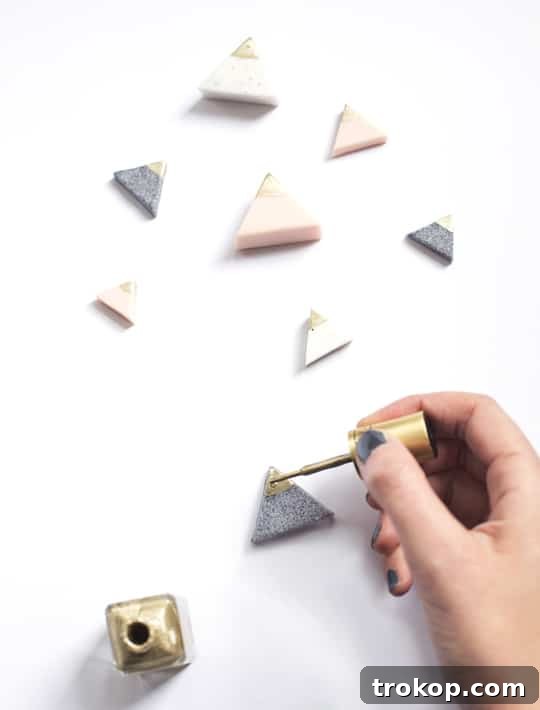
Cool and Paint: Once baked, leave the clay shapes to cool completely, so they harden properly. Then, paint the tips with the metallic gold nail polish and leave to dry. This adds a touch of glamor and sophistication.
-
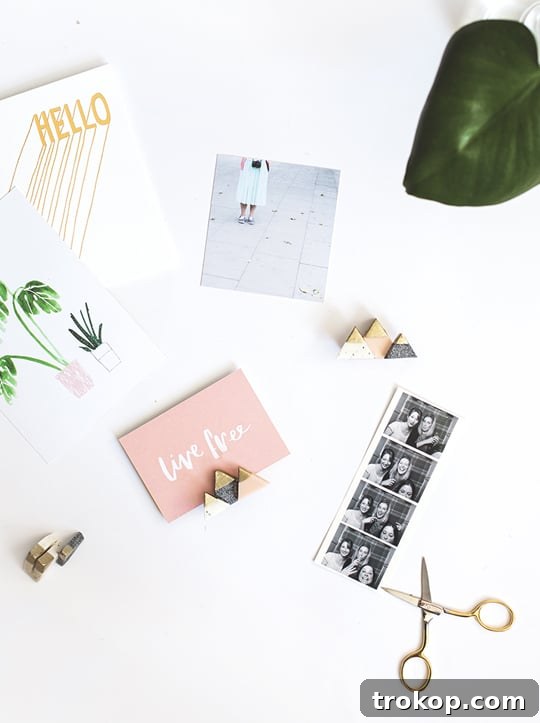
Assemble the Mountains: Now you can assemble the mountain holders. Squeeze a little all-purpose glue on either corner of a large triangle and sit a medium and small triangle against it to create the look of a mini mountain range.
-
Let it Dry: Make sure the assembled mountain shapes sit flat against the ground and leave them to dry completely. Repeat with the remaining shapes. Voila! You’ve created your own unique photo holders!
Creative Alternatives: Other Ideas for a DIY Photo Holder
Looking for alternative photo holder ideas? Get creative and repurpose everyday items to display your photos in unique ways!
- Toys as Photo Holders: Wrap wire around a toy car for a child’s room or use plastic dolls in a girl’s space!
- Planter Photo Holders: Wrap wire around a small planter for a touch of greenery.
- Seashell Photo Holders: Seashells are the perfect alternative to clay for creating photo holders in a nautical or beach-themed setting.
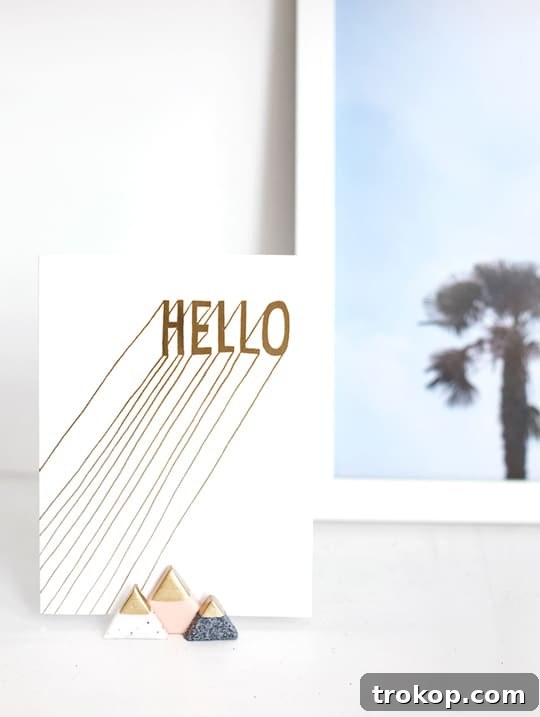
Personalize Your Project: Ways to Customize These Mini Mountain DIY Photo Holders
One of the best things about this project is its flexibility. There is hardly any effort or skill required in this clay project and no need to exercise your hands after all!
Feel free to experiment with different clay colors and perhaps even use paint to create patterned mountains. Get creative with your color schemes and add unique designs!
Why not upscale the project to create a bigger DIY mountain range to hold larger prints? These are also perfect for displaying upcoming holiday cards, or even business cards!
If you loved this DIY watercolor wall art project, be sure to check out our other favorite home decor DIY ideas!
If you find this DIY photo holder easy to make, check out a few of our other DIYs in our archives below —-
- 20 Creative DIY Candle Holder Ideas To Give Your Home A Burst Of Color & Scent
- DIY Minimal Beaded Blanket Holder
- Dual Copper Candle Holder
- Clay Rose Marbled DIY Incense Holder
- DIY Faceted Easter Egg Place Card Holders
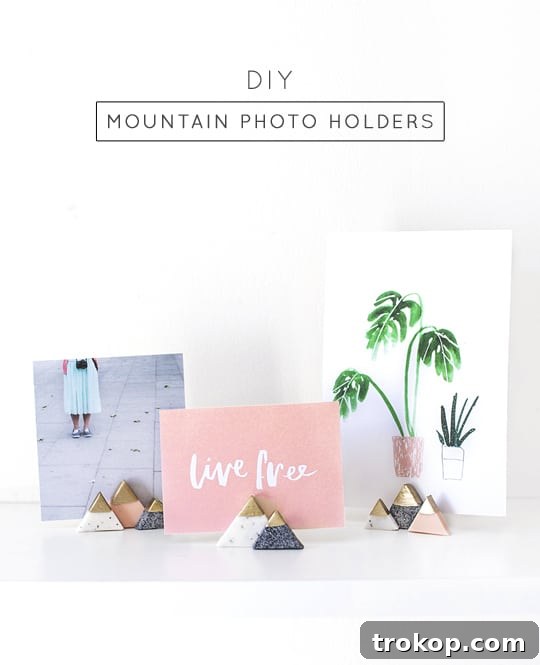
Mini Mountain DIY Photo Holder Recipe

Summary: Transform your favorite photos into a stylish and functional piece of decor with this easy DIY photo holder tutorial.
Prep Time: 20 mins
Bake Time: 15 mins
Total Time: 35 mins
Course: DIY
Category: Home Decor
Equipment
- Cutting knife
- Cutting mat or board
Materials
- 3 blocks polymer clay
- Metallic gold nail polish
- All-purpose glue
Instructions
- Preheat your oven to the temperature suggested on the clay packet.
- Cut your clay block in half with your knife to make the whole thing thinner.
- Cut triangles from this thickness, about an inch tall. These will be your actual holders.
- Use your knife to cut down the middle from the top of each, just stopping short of the bottom. This will provide the slit for you photos/postcards to sit in.
- Cut the remaining clay in half again so it’s left even thinner than before but not so thin that it becomes really flimsy.
- Cut out medium and small triangles from this new thickness, to be used along with the larger ones later.
- Place all of these on a tray lined with foil or baking paper and oven bake for the length of time suggested on the clay packet.
- Once baked, leave to cool so all the shapes have hardened. And then, paint the tips with the metallic gold nail polish and leave to dry.
- Now you can assemble the mountain holders. Squeeze a little all purpose glue on either corner of a large triangle and sit a medium and small triangle against it to create the look of a mini mountain range.
- Make sure they sit flat against the ground and leave to dry. Repeat with the remaining shapes.
Cost: $20
Our Most Popular DIY’s!
DIY Pom Pom Wall Hang
Add a whimsical touch to your home with this fun pom pom wall hanging tutorial.
DIY Marble Table Top with Gold Accents
Elevate your space with a stunning DIY marble table top accented with gold.

Ikea Bed Hack: DIY Wooden Headboard With Stikwood
Transform your bedroom with this stylish and easy Ikea bed hack.
DIY Ikea hack dresser and prepping for guests
Learn how to repurpose an IKEA dresser to fit your room.

DIY Ikea Hack Floating Credenza
Try out this fun Ikea hack to make a floating credenza.
How to Make a DIY Knot Pillow
Use this simple guide to learn how to make a DIY knot pillow.